Table of Contents
The AirPods Pro pack a lot more features than you’re used to. Even if you learn how to use it well, you can achieve more than twice the effect compared to the current use, so please use it as a reference. Since AirPods are releasing a new model after a lot of feedback and research, the basic functions are also very faithful. I hope you try using the various features after learning how to test the suitability of Airpods Pro, how to use noise canceling, how to update, etc. to learn how to use all of the added features along with basic features.
AirPods Pro Basic Features
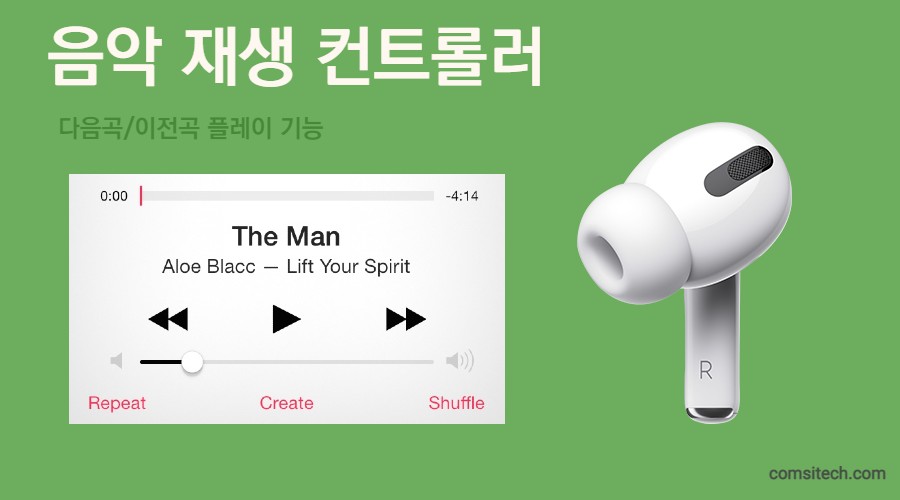
music play controller
When using it as a music player controller, you can control it by pressing the flat area on the side. This part is called a force sensor, and regardless of left or right, if you press it once, you can use it as a stop or play function. You can also select the next song by pressing it twice quickly, and play the previous song by pressing it three times quickly.
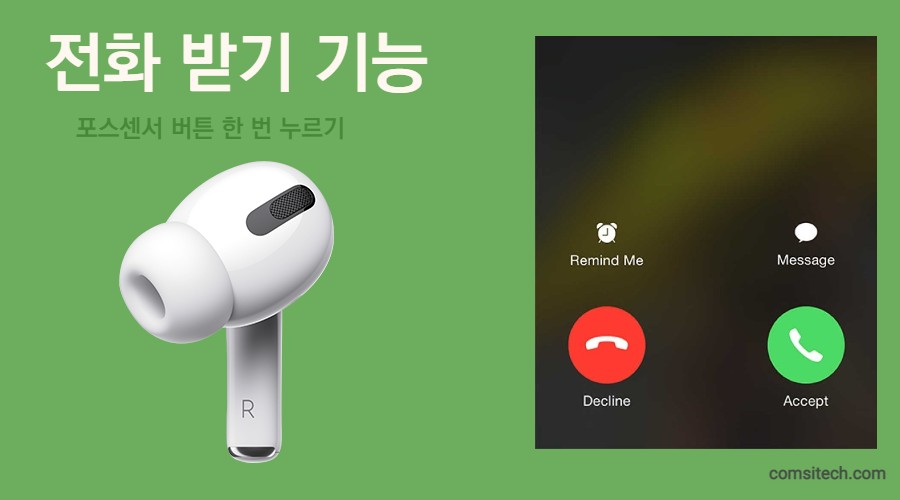
Call answer function
If you receive a call from outside while using AirPods Pro, you do not have to use your phone directly. In this case, you can press the force sensor button once, and you can receive a call when it comes. If you want to make a call without looking at your iPhone, you can make a call through Siri without using your phone after activating Siri and setting the button input.
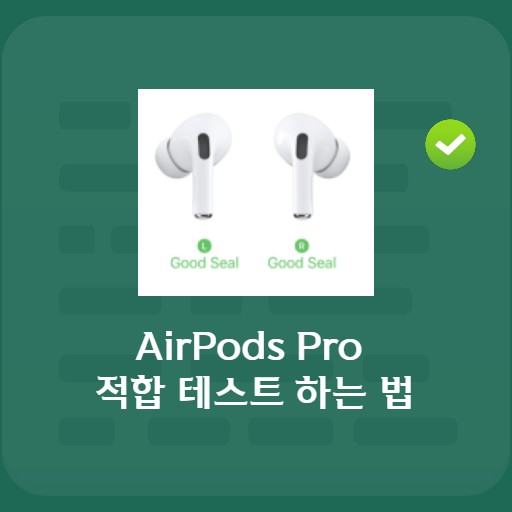
How to test the fit of the AirPods Pro
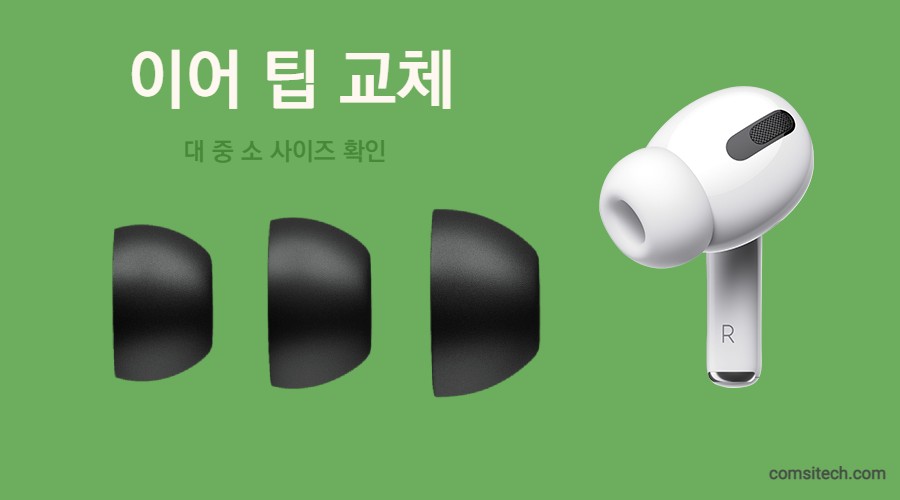
Replace eartips and check fit
Unlike the basic AirPods series, AirPods come with 3 ear tips. Available in large, medium, and small sizes, the ear tips can be interchanged to fit your ears. The color is provided in the same color as the AirPods, and a program is provided to test the suitability after wearing it in the app. The eartips are medium-sized when opened. In addition, you have to apply physical force to replace it, but if you pull it back enough for the tip to come off smoothly, it will come off easily. Please do not forcefully twist or use tools, and pull by hand.
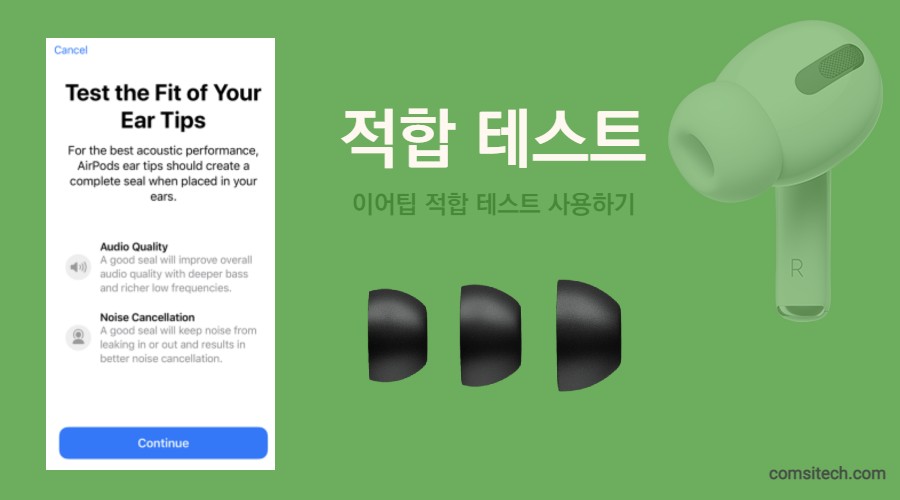
Getting Started with Fit Testing
To use Test the Fit of Your Ear Tips, if you press the Settings > Bluetooth > About AirPods Pro icon, you can see the test screen where you can test the fit as above. Before using the product, you can check whether it is optimized for your ears by listening to music.
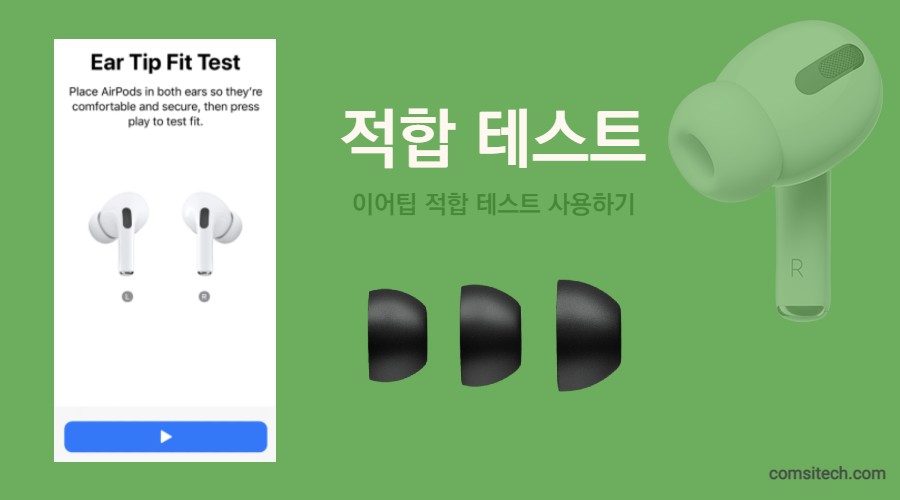
Proceeding with the left-right conformance test
You may need to use different sizes depending on your individual ears. Please press the play button above as you change ear tips. In a comfortable and stable state, you can check whether the music is flowing or not flowing. If the pressure applied to the ears is burdensome or if they are too wide and likely to fall out, you need to change the size.
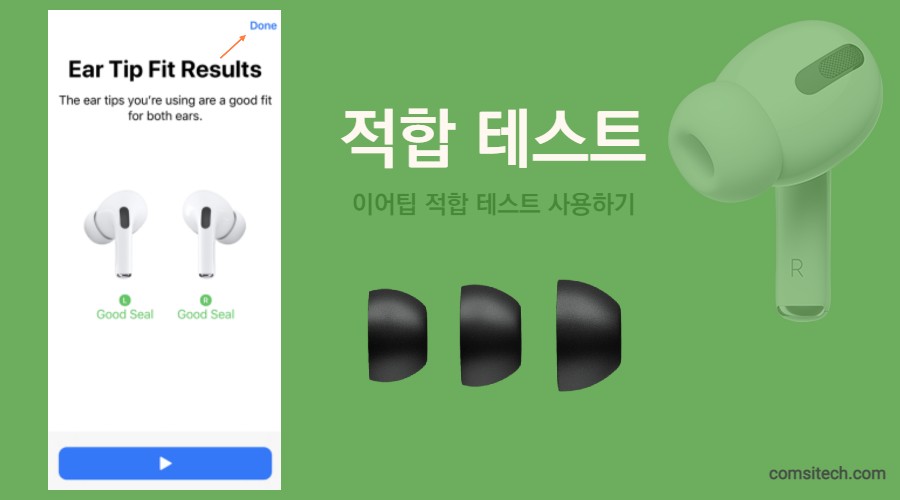
Completing the Fit Test
Physical replacement The conformance test is completed with the following audio tests. If you think the AirPods are optimized for your ears, just press the Done button in the upper right corner.
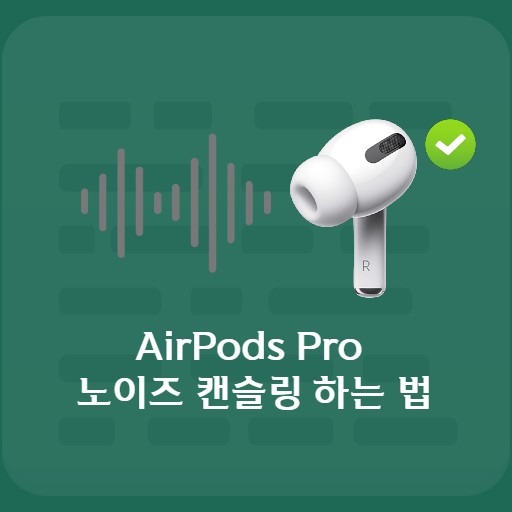
How to set up noise canceling
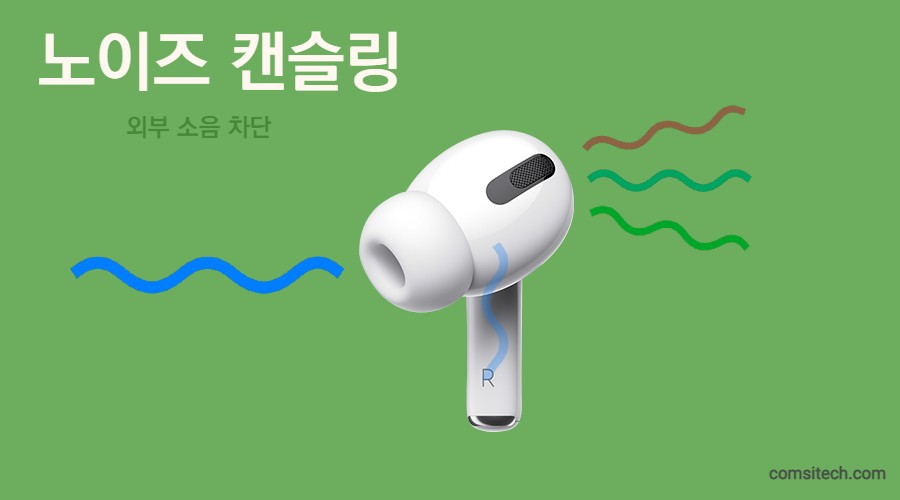
What is Noise Canceling?
AirPods Pro provide a noise canceling function. With this function, you can immediately block outside noise while listening to music. Initially started as a technology to reduce aircraft noise, the noise canceling function has excellent shielding capabilities that can be called earplugs. When external noise, which is a wave, is sent to the ear in the reverse direction, the external noise and the artificially created wave are offset in the eardrum and shielded. Thanks to this, you can call it a battery-powered external noise blocking earplug. The noise canceling function provided by AirPods Pro can be activated, allowed, and turned off. And since the left and right settings of the force sensor touch can be individually set, you can set Siri conversion or noise canceling On-Off.
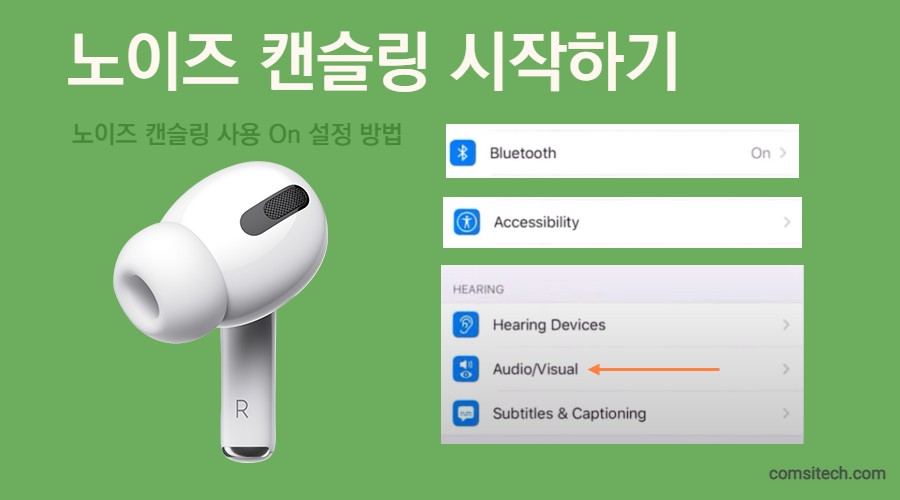
Get Started with Noise Canceling
To turn on noise canceling mode, Bluetooth > AirPods Pro pairing must be prioritized. Afterwards, select the Accessibility > Audio Visual tab.
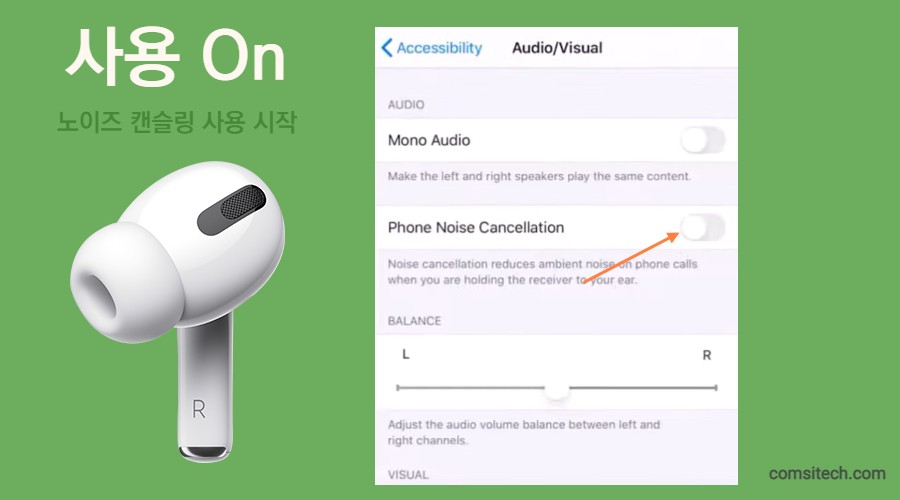
Turn on noise canceling
You can turn on noise canceling mode in visual effects. Please switch to On mode for usage setting. There is no problem with video conferencing outside.
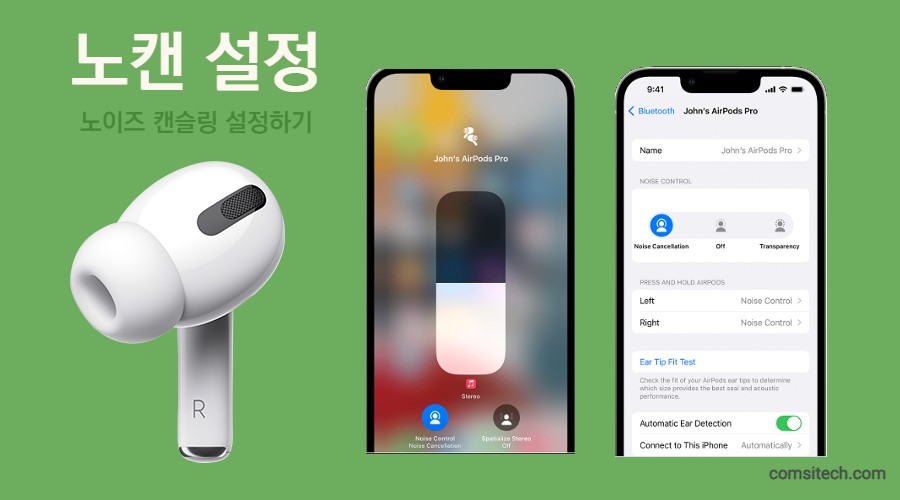
How to set noise canceling preferences
The default settings are active mode / ambient sound mode / off. All three can be used through the force sensor button in the mobile settings, and the two can be used interchangeably.
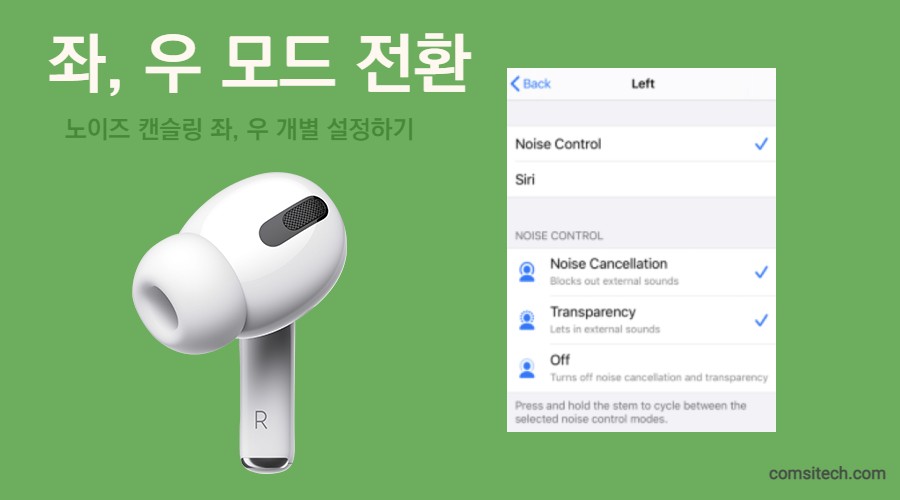
Left and right individual setting function
You can set the noise canceling and Siri buttons to the left and right differently. For example, the left AirPod can only have a no-can setting, and the right one can have a Siri button. This way, if you want to make a call, you can do so by entering a command via Siri. And as shown above, only the noise canceling mode and ambient noise acceptance mode are available except for Off.
How to update AirPods Pro
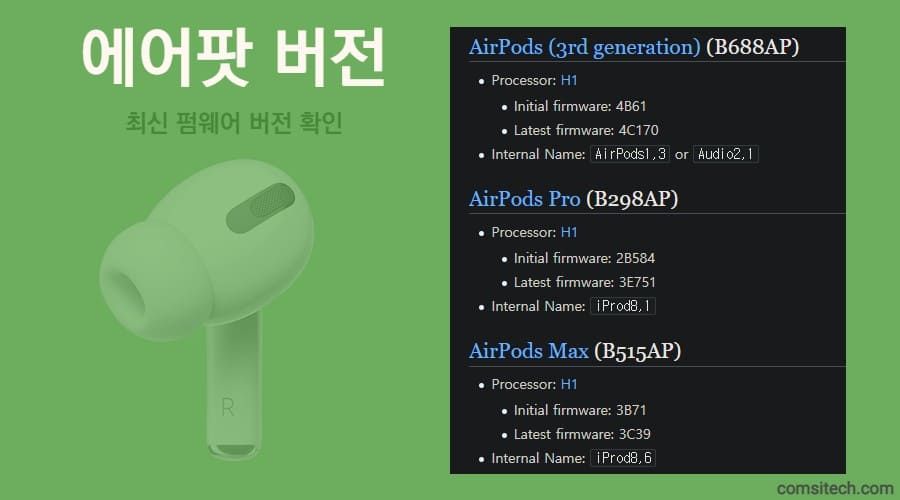
Check the latest version of AirPods Pro
When using wireless earphones, the latest features and bug fixes are being made from time to time. Even for AirPods Pro, we recommend that you keep the latest updated version. In general, it is configured to update automatically between intervals when using it, but if the update does not run immediately, or if you want to check individually, it is recommended to check the firmware version.
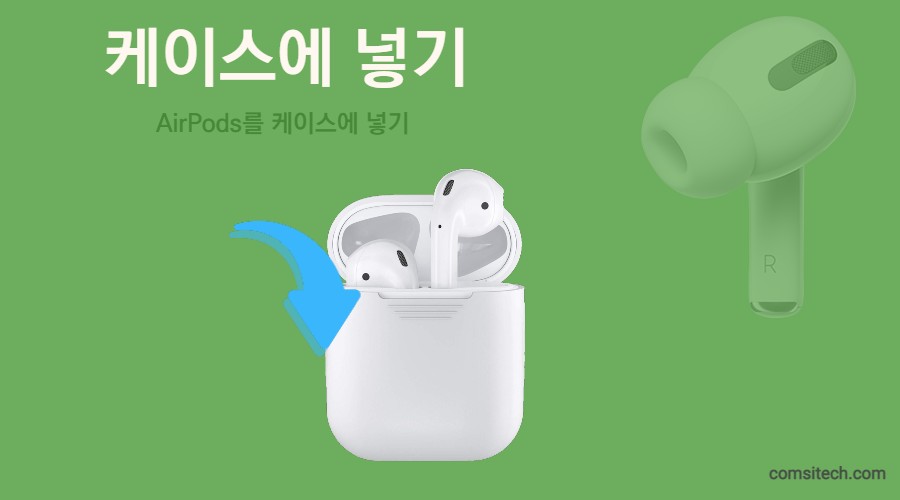
Putting the AirPods Pro in the Case
AirPods Pro do not update while in use. To proceed with the upgrade, you must put it in the case and be in charging mode. Please make sure your AirPods Pro have more than 50% battery and your iPhone is connected to Wifi.
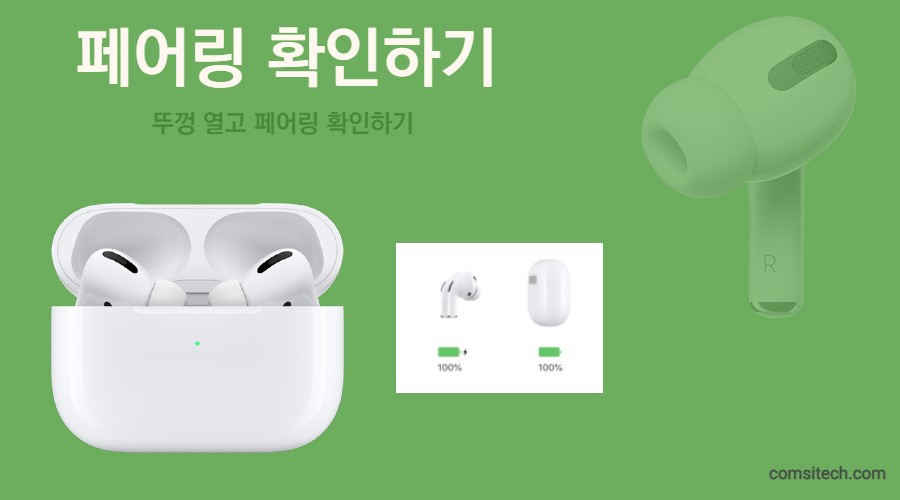
Check pairing
With the case lid open, you can check the pairing status of your mobile device. Pairing is done automatically with a normal Bluetooth connection, but if pairing is not done, please perform the pairing operation first.
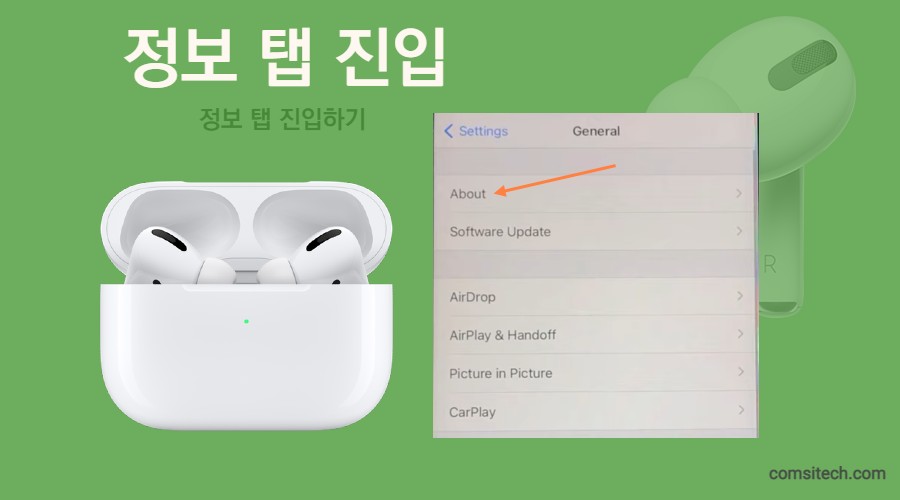
Enter the Settings tab before updating
Go to Settings > General tab to check the version if you need to update.
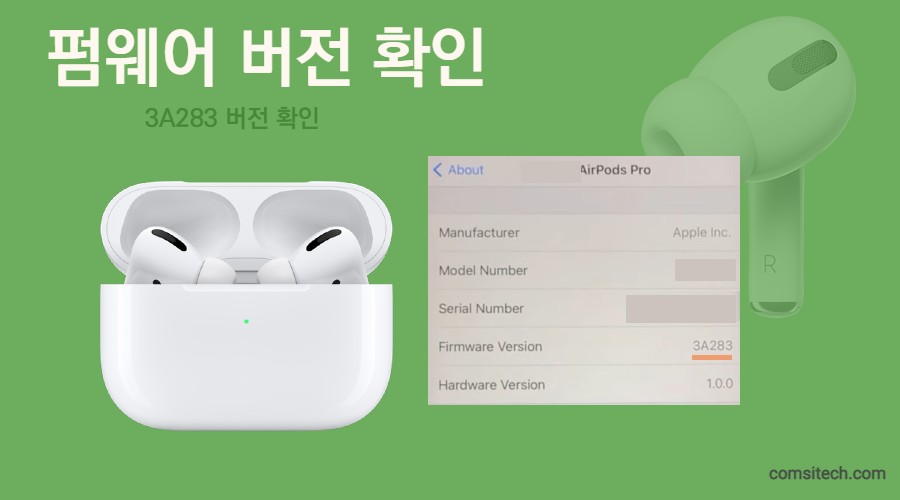
Checking the Firmware Version
If you select Settings > General > About tab, you can check your AirPods version through Check My AirPods. The current AirPods version is 3A283. I checked above that it is not the latest version. It can be seen as a situation in which a firmware update is required.
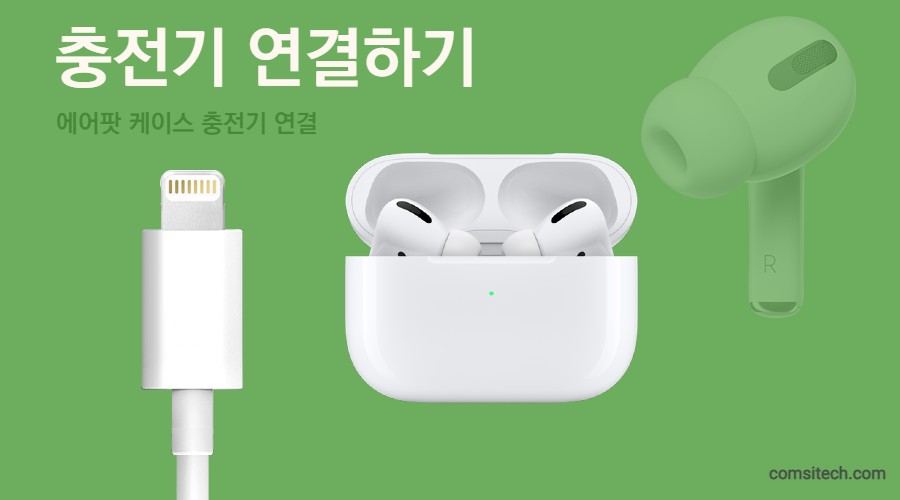
Connect the charger to the AirPods Pro case
After checking the firmware version, connect the charger to the case. After connecting the charger and closing the lid, the update proceeds.
The update of AirPods Pro proceeds while charging + iPhone is connected to Wifi.
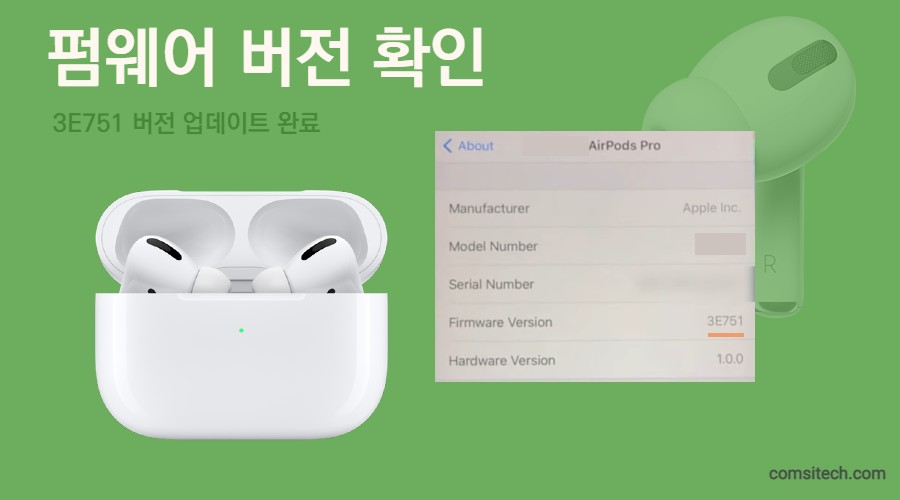
Checking the Firmware Version
After opening the lid again, you can check if the update has been completed by pairing. If you check the firmware version in Settings > General > About > My AirPods Pro, you can see that it has been updated to a different 3E751 version than before.
FAQ
If you want to make a call without looking at your iPhone, you can make a call through Siri without using your phone after activating Siri and setting the button input.
Regardless of left or right, if you press it once, you can use it as a stop or play function. You can also select the next song by pressing it twice quickly, and play the previous song by pressing it three times quickly.
In order to replace it, you need to apply physical force, but just pull it back enough for the tip to come off easily and it will come off easily. Please do not forcefully twist or use tools, and pull by hand.
You can set the noise canceling and Siri buttons to the left and right differently. For example, the left AirPod can only have a no-can setting, and the right one can have a Siri button. This way, if you want to make a call, you can do so by entering a command via Siri.
Reference
- Connecting AirPods and AirPods Pro to iPhone
- How to test the fit of AirPods Pro
- How to set up AirPods Pro noise cancellation
- How to update your AirPods Pro